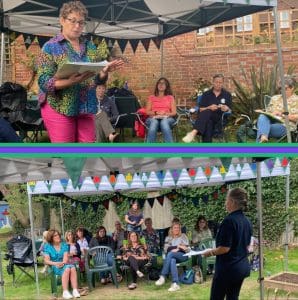
Setting up the Gazebo
The Green Hub gazebo s look fantastic at events, but it pays to know how to set them up!
We have two Gazebos…
- One is 3m x 3m and is the ‘normal’ one for most events
- The other is 4.5m x 3m
- They come with a set of sides each (with door and windows) which works for cold weather or an overnight stop
- They can be joined together – eg for a training event in the garden – with a useful ‘gutter’ and leg clamp kit
- We also have extra secure fittings for tying them down to the ground in bad weather
- Both have bespoke bunting in the Green Hub colours, featuring the ‘little people’ on our logo.
- This was a labour of love by a handful of members and it should be treated with love and care.
- There is a specific order to the bunting – so that the logo colours follow in the correct order – and each of the panels is labelled
This is a simple guide to putting the Gazebo up …
For privacy reasons YouTube needs your permission to be loaded. For more details, please see our Privacy policy.


Other key equipment
Kept at the Green Hub storage unit in Witley, unless stated otherwise:
- Large tables
- Green Hub has 2 x 180cm x 30cm tables
- These are perfect as the ‘frontage’ for any Gazebo, as they will take all our leaflets, plants for sale etc.
- There is also a 3rd table available at Luck’s yard (in the shed).
- Small tables (kept at Vanessa’s house)
- Vanessa also has 2 smaller tables of the same type – these are useful to but across the back of the Gazebo for stock and so forth
- Table cloths
- We have 3 GREEN tablecloths, two of which have a Green Hub banner to velcro to the front – it helps to do this 2 handed to get it nice and straight. Looks fab!
- If using two tables, make sure the cloths and banners line up nicely
- There are table cloth clips and weights in the event bag
- Banners
- We have 2 banners that really dress the stand well – however, they can blow over in the wind
- Be careful as you put them up – 2 handed and horizonal is probably easier – and make sure the pole goes through both the holes in the base. Otherwise the banner tips forward and bends out of shape
- We have some sand / water weights in the BIG shed (black nylon bags with velcro (for the stand pole), and room to hold 2 x 2 litre water bottles
- Please make sure these go back in the correct bags – one for the garden and one for the talks
- Event bag
- The event bag has all sorts of useful bits and pieces:
- Clip boards x 2 to help write notes / take email details / keep event briefing notes
- Event book – to record messages to be followed up (make sure they are written clearly so that someone knows precisely what to do after)
- Pens
- Box of leaflets
- Poster and leaflet holders
- Tablecloths and banners
- Tablecloth weights and clips
- Bin bags
- The event bag has all sorts of useful bits and pieces:
- Donation buckets and pots
- Three BIG buckets
- And two POTS
- Always check in advance that it is OK to request donations
- If the event is deemed to be in a public space (eg. the High Street), you need a license
- Fish bowl
- Useful to house Haribo to give away, or pine cones (or other item) for a ‘guess how many’ competition
- SumUp machine (kept at Vanessa’s house)
- The SumUp machine is a way of taking credit card payments via blue tooth
- Someone at the event needs to have the Sum Up App on their phone (talk to Vanessa for login details)
- Products can be pre-coded for price before the event
- You select the products on the phone (plus any adhoc donation) and go to CheckOut
- It will request their card – they wave it over the SumUp and it should register – check to ensure the payment has gone through
- Paper Bags (kept at Vanessa’s house)
- We have plenty – make sure you have enough for sales

